How to Complete the DS-160 Application: A Step-by-Step Guide
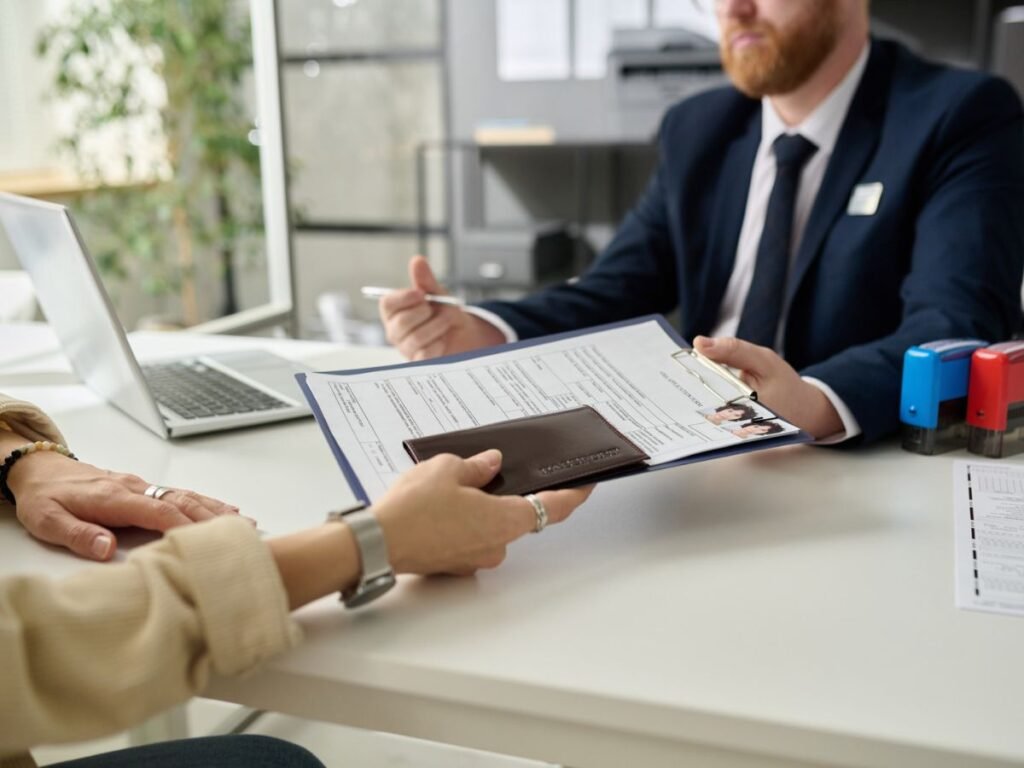
Everything you need to know about preparing, completing, reviewing, and submitting your DS-160 for a U.S. nonimmigrant visa.
Applying for a U.S. visa involves several important steps, and completing Form DS-160 is one of the most essential.
Whether you are planning a vacation, visiting family, attending university, or traveling to the United States for business, you may be required to complete this online application before moving forward with your visa process.
The DS-160 collects personal, travel, employment, education, and background information that U.S. consular officers use when reviewing visa applications.
Although the form may initially seem complicated, understanding its structure and preparing your information in advance can make the process much more manageable.
In this guide, we explain how to complete the DS-160 step by step, what information to prepare, which mistakes to avoid, and what happens after you submit your application.
1. What Is Form DS-160?
The DS-160, Online Nonimmigrant Visa Application, is an electronic application form administered by the U.S. Department of State.
It is used for most nonimmigrant visa categories, including:
- B1/B2: Business and tourism visits.
- F1: Academic studies.
- M1: Vocational studies.
- J1: Exchange visitor programs.
- H, L, O and other categories: Certain temporary employment and specialized activities.
The DS-160 is also used for certain K visa applications. Some specialized categories and circumstances involve additional or different forms.
Information submitted through DS-160 helps consular officers evaluate applications under applicable U.S. immigration laws.
Important: Submitting a DS-160 does not mean your visa application has been approved. It is one stage of the overall application process.
Where can you complete the DS-160?
The official DS-160 application is available through the U.S. Department of State’s Consular Electronic Application Center.
Start Your DS-160 on the Official U.S. Government Website
The official website ends in .gov.
You should avoid entering passport or sensitive personal information into unverified websites claiming to be official DS-160 portals.
2. What Documents and Information Do You Need?
Before starting, gather the information you may need throughout the application.
Preparing in advance can reduce interruptions and help you avoid entering inconsistent or incomplete information.
Personal information
Prepare:
- Your current passport.
- Full legal name and other names used, where applicable.
- Date and place of birth.
- Nationality information.
- Home address and contact details.
- Relevant personal identification information.
Travel information
You may need:
- Your intended purpose of travel.
- Planned travel dates, if known.
- Expected duration of your visit.
- Intended U.S. destination.
- Previous U.S. travel information.
- Details of your travel companions, if applicable.
Employment and education information
Prepare information about your current occupation, employer, employment history, and education where requested.
A résumé or CV may be useful for applicants who need to provide detailed work or educational information.
Previous travel and visa history
You may be asked about previous U.S. visits, visa applications, and relevant international travel history.
Have older passports and travel records available if they help you provide accurate answers.
Additional information for students
F1, M1, and J1 applicants may need their Form I-20 or DS-2019 and SEVIS identification information.
Additional information for certain temporary workers
Applicants in petition-based visa categories may need details from an approved petition or other supporting documents.
Preparation tip: Create a secure folder containing your reference documents before starting. This makes it easier to verify names, dates, addresses, and travel information.
3. Step 1 – Access the Official DS-160 Website
Visit the official CEAC DS-160 website.
On the starting screen, select the U.S. Embassy or Consulate location where you intend to apply.
You can also select a tooltip language to help you understand the questions.
The language support feature provides translations of many questions, but your answers generally must be entered in English using English characters, except where the form specifically requests your name in your native alphabet.
Select Start an Application.
The system will generate a unique Application ID and ask you to set or answer a security question.
Save your Application ID
Your Application ID is important because it allows you to retrieve a partially completed application.
Keep the following information in a secure location:
- Application ID.
- Security question and answer.
- Other retrieval information requested by the system.
Do not share these details publicly or store them in an unsecured document.
4. Step 2 – Complete Your Personal Information
The Personal Information sections collect important identifying details.
This may include your:
- Surname and given names.
- Other names previously used.
- Sex and marital status information.
- Date and place of birth.
- Nationality and other nationality information.
- National identification details, where applicable.
Match your passport carefully
Pay particular attention to the spelling and structure of your name.
Your passport should be your primary reference for passport-related information.
If you have multiple surnames, no given name, or another unusual name format, read the field-specific help instructions provided in the official DS-160 system.
Do not guess how to divide or abbreviate names.
Common mistakes to avoid
- Reversing surnames and given names.
- Misspelling names.
- Entering incorrect birth dates.
- Omitting previously used names when requested.
- Providing inconsistent nationality information.
Small data-entry errors can cause unnecessary complications later in the process.
5. Step 3 – Enter Your Travel Information
The Travel Information section asks about the purpose and circumstances of your intended trip.
For example, a B1/B2 applicant may need to explain whether the planned visit involves tourism, business activities, visiting relatives, or another permitted visitor purpose.
Typical information requested
Depending on your application, you may need to provide:
- Purpose of travel.
- Intended travel dates.
- Expected length of stay.
- Location where you expect to stay.
- Details of the person or organization paying for the trip.
- Information about travel companions.
What if you have not booked your trip?
Applicants do not necessarily need finalized travel bookings before beginning every visa application.
If the form allows you to provide intended plans, enter your genuine current plans or estimates as requested.
Do not invent reservations, addresses, sponsors, or travel arrangements.
The U.S. Department of State generally advises applicants not to make final travel plans or purchase tickets before receiving a visa.
Keep your travel purpose clear
Your answers should accurately describe what you actually intend to do in the United States.
For example, an applicant planning a family visit should explain that purpose truthfully rather than trying to select an answer that seems more favorable.
6. Step 4 – Complete Your Travel History and Contact Details
The DS-160 may request information about your previous visits to the United States, prior U.S. visas, and other travel history.
You may also be asked for your address, phone numbers, email address, and other contact or background information, including social media identifiers where required.
Previous U.S. travel
You may need details such as:
- Previous visits to the United States.
- Dates of past travel.
- Previous visa information.
- Previous visa refusals, if any.
- Other immigration-related history requested by the form.
If you have held a U.S. visa before, use previous passports and available records to help verify your answers.
Previous visa refusals
If you have been refused a U.S. visa, answer any relevant questions accurately and completely.
Do not omit information because you believe it may negatively affect your application.
Misrepresenting information can have serious immigration consequences.
7. Step 5 – Provide Family, Employment and Education Information
The DS-160 also collects information about your personal background.
Depending on the visa category and the applicant’s circumstances, the form may ask about family relationships, employment, and education.
Family information
You may need to provide details about:
- Parents.
- Spouse, if applicable.
- Certain relatives in the United States.
- Other family relationships requested by the form.
Employment information
You may be asked to provide:
- Current occupation.
- Employer’s name and address.
- Job title and responsibilities.
- Previous employment history.
- Other work-related details.
Education information
Depending on the application, you may need to provide information about schools, educational institutions, qualifications, or periods of study.
Best practices
Use accurate employment titles and truthful descriptions of your responsibilities.
Check dates and information against available records.
If you are unemployed, retired, self-employed, or currently studying, describe your actual circumstances using the appropriate available fields.
Do not change or exaggerate employment details to make your application appear stronger.
8. Step 6 – Answer Security and Background Questions
The DS-160 contains a series of security and background questions.
These may cover matters such as health, immigration history, criminal history, security, and other topics relevant to U.S. visa processing.
The questions vary according to the application and the information provided.
Important guidance
Read every question carefully.
Answer truthfully and completely.
Do not assume that an affirmative answer automatically means your application will be refused, or that withholding information will improve your chances.
If a question involves complicated personal or legal circumstances that you do not understand, consider obtaining advice from a qualified U.S. immigration attorney or another authorized legal professional.
KPVISA’s preparation tools do not replace individualized legal advice.
9. Step 7 – Upload Your Visa Photograph
The DS-160 application generally includes a digital photograph upload.
Your photograph must meet the current U.S. Department of State specifications.
Common photograph requirements
The photo generally must:
- Be in color.
- Have been taken within the past six months.
- Show your current appearance.
- Have a plain white or off-white background.
- Show your full face with an appropriate neutral expression.
- Meet the official size, composition, and technical requirements.
Eyeglasses generally are not permitted in visa photographs, subject to limited exceptions.
Do not digitally alter your appearance in a way that violates official requirements.
What happens if the upload fails?
If your DS-160 confirmation page indicates an unsuccessful photo upload, you may need to bring a compliant printed photograph following the instructions of the Embassy or Consulate where you apply.
Always check local requirements.
For specifications and examples, visit the official U.S. Visa Photo Requirements.
10. Step 8 – Review Your Application Before Submission
One of the most important parts of completing DS-160 is reviewing your information before submitting it.
Take time to check each section.
DS-160 review checklist
- My name matches the relevant passport details.
- My passport number and expiration date are correct.
- My date of birth is accurate.
- My travel purpose reflects my actual plans.
- My travel history is complete and truthful.
- My employment and education details are accurate.
- I have answered applicable background questions truthfully.
- My photograph meets the requirements.
- I have reviewed the form for errors and missing information.
Why reviewing matters
The U.S. Department of State warns that inaccurate or incomplete information can require corrections and may cause appointment complications.
Inaccurate information can also lead to more serious consequences depending on its nature.
Carefully review the application rather than rushing through the final pages.
11. Step 9 – Electronically Sign and Submit Your DS-160
After reviewing your application, proceed to the electronic signature and submission process.
When you electronically sign the DS-160, you certify that the application has been completed truthfully and correctly to the best of your knowledge and belief.
In general, applicants must electronically sign and submit their own applications, with limited exceptions provided under the official rules.
A third party may assist in appropriate circumstances, but assistance must be disclosed where the form requires it.
After successful submission
You will receive a DS-160 confirmation page containing a barcode.
Save this page securely.
You should also print it for your records and visa appointment when required.
You generally do not need to print your entire DS-160 application.
Important: The DS-160 confirmation page is not a visa approval notice.
12. Step 10 – Continue With Your Visa Application Process
Completing DS-160 is only one part of the overall visa application procedure.
Depending on your visa category and application location, you may need to:
- Pay the required visa application processing fee.
- Register with the applicable visa appointment system.
- Schedule an interview, unless an interview-waiver procedure applies.
- Prepare your supporting documents.
- Attend the required appointment.
- Follow the instructions provided by the U.S. Embassy or Consulate.
The exact order and procedures can vary by location.
Always use the official Embassy or Consulate instructions and its authorized appointment service.
Do not assume that completing DS-160 automatically schedules your interview.
How to Save and Retrieve an Incomplete DS-160
The DS-160 system allows applicants to save their progress and return later.
When you create an application, keep your Application ID and security answer securely.
The official system generally allows you to return to an incomplete application within 30 days.
For longer-term storage, follow the system’s instructions to save an application file locally.
Helpful tips
- Save progress regularly using the application’s navigation.
- Keep your Application ID somewhere secure.
- Avoid relying on your browser’s back button to save changes.
- Do not save sensitive application files on public or shared computers.
- Retrieve your application through the official CEAC website.
The system may log you out after inactivity, so regular saving is important.
Can You Correct a DS-160 After Submission?
Mistakes discovered after submission require special attention.
Depending on the circumstances, you may need to create a new application or follow correction instructions issued by the relevant U.S. Embassy or Consulate.
If an interview has already been scheduled, submitting a new DS-160 without checking local instructions may create problems with your appointment records.
What should you do?
- Identify the error.
- Review the official DS-160 correction instructions.
- Check the instructions of the Embassy or Consulate where you are applying.
- Follow the required procedure for associating the correct application with your appointment.
Do not assume that changing the DS-160 confirmation number after booking is automatically accepted by every appointment system.
For additional information, read the official DS-160 Frequently Asked Questions.
Common DS-160 Mistakes and How to Avoid Them
| Common mistake | Practical prevention |
|---|---|
| Incorrect passport details | Compare all information with your passport |
| Incomplete travel history | Review previous passports and available records |
| Incorrect employment dates | Use accurate employment or educational records |
| Wrong application location | Verify the intended Embassy or Consulate |
| Incomplete answers | Read each applicable question carefully |
| Inconsistent information | Review related answers throughout the application |
| Losing the Application ID | Save retrieval details securely |
| Incorrect photo specifications | Check official photograph requirements |
| Rushing through submission | Perform a final review before signing |
The most useful preparation strategy is to be organized, consistent, and truthful.
Frequently Asked Questions About DS-160
Is the DS-160 application free?
The DS-160 is an official government online application form. There is no separate fee simply for accessing and completing the form.
However, applicants generally must pay the applicable government visa application processing fee and potentially other required fees.
Private preparation assistance, if purchased, is charged separately.
How long does it take to complete DS-160?
The official CEAC website estimates approximately 90 minutes to complete an application.
Actual preparation time varies depending on the applicant’s circumstances and whether all necessary information is available.
Can someone help me complete my DS-160?
The official rules allow assistance in certain circumstances.
However, the applicant generally remains responsible for reviewing and electronically signing the application, except where a permitted exemption applies. Any required third-party assistance information must be disclosed.
Can I complete DS-160 in my native language?
Answers generally must be entered in English using English characters, except where the form specifically requests a name in the native alphabet.
Translated help text may be available to help applicants understand the questions.
Can I reuse information from an old DS-160?
The official CEAC system provides ways to populate a new application using certain information from a previously saved or submitted application.
Review all imported information carefully because circumstances, addresses, passport details, and employment information may have changed.
Does submitting DS-160 guarantee a visa interview appointment?
No. Completing DS-160 does not automatically create an interview appointment.
You must follow the appointment procedures for the location where you apply, unless the applicable process provides otherwise.
Do I need a DS-160 for each family member?
Generally, every individual applying for a nonimmigrant visa needs a separate DS-160, including children.
The system offers certain family or group application functions that can help reuse information, but each applicant still needs an individual application.
Does KPVISA submit the DS-160 for customers?
No. KPVISA’s current preparation services provide guides, checklists, and support tools within the purchased package. Applicants are responsible for completing and submitting their own DS-160 applications.
Prepare Your U.S. Visa Application With KPVISA
Completing the DS-160 can involve many questions, detailed personal information, and important preparation steps.
Having access to organized instructions and reliable resources can help you manage the process more efficiently.
KPVISA is an online U.S. visa preparation support platform combining practical guidance, AI-powered tools, and human assistance within the scope of each service package.
How KPVISA can help
Depending on your selected package, KPVISA offers:
Step-by-Step Preparation Guides
Understand key application steps and organize the information you need.
Document Checklists
Keep track of supporting materials and preparation tasks.
AI-Powered Preparation Tools
Access supported AI assistance and interview practice features.
Personal Preparation Dashboard
Monitor your progress, access resources, and manage your preparation activities.
Human Support
Contact the KPVISA team for assistance within the services included in your package.
KPVISA does not complete, review, electronically sign, or submit the DS-160 application on your behalf.
Explore KPVISA Visa Preparation Services
B1/B2 Tourist & Business Visa Preparation – $150
For applicants preparing for tourism, family visits, or eligible business travel to the United States.
Explore B1/B2 Visa Preparation
B1/B2 Visa Renewal Preparation – $100
For previous B1/B2 visa holders looking for structured renewal preparation support, within the stated package scope.
Explore B1/B2 Visa Renewal Preparation
You can also explore all available packages:
Official Resources
For current and authoritative information, visit these U.S. government resources:
- DS-160 Online Nonimmigrant Visa Application – U.S. Department of State
- Official DS-160 Application Portal – CEAC
- DS-160 Frequently Asked Questions
- U.S. Visa Photo Requirements
- U.S. Visa Application Fees
Last reviewed: October 2026. Visa procedures and requirements may change. Always confirm current instructions with official U.S. government sources.
Disclaimer
KPVISA is a brand of KPLAW USA LLC (Missouri, USA). KPVISA is not a law firm or government agency and does not provide legal advice or represent applicants before U.S. government agencies.
This article provides general educational information and does not constitute personalized immigration advice. Visa decisions are made solely by authorized U.S. government officials.
This guide is general information, not legal advice. Rules change – always check the official U.S. government website for your case.